Saturday, November 29, 2014

Dropcam for $99 at Home Depot

In case you missed the Dropcam deal on Amazon, I spotted this at Home Depot:


It looks like they are discontinuing the cheaper Dropcam camera at Home Depot. That is cheaper than an equivalent-featured baby monitor and if you have SmartThings, it does so much more.

-Chris

Building a Playground without Spending a Fortune (Part 4)

In part one we prepped, in part two we built the fort and part three attached the hardware. That leaves us here:


I left one of the support posts tall in order to attach a flag pole to eventually. I staked out the area and used landscape timbers to separate it from the rest of the yard. After filling the area with a few yards of quality mulch, filling the sandbox with sand and planting a replacement tree, all that is left is to stain it after a few months.


It had to survive a few freak snow storms before it could finally get stained.


After trying out a few stains on some scrap wood, I eventually settled on the Sikkens translucent mahogany stain. It is dark red and matches our deck. In this picture, you can see the rock climbing holds on the ladder, the yellow handles and after a nephew whacked his head on the 2x4 crossbars I added two safety pads .


After a year, the playground and sandbox has gotten a lot of use and I expect that it will last for many years to come. The fort easily supports several adults without so much as a wobble. 

I plan on staining the landscape timbers to match when I get some time. I am also not happy with the quality of the sand that I got from Home Depot. I am going to look for volleyball sand in the Spring. I may also upgrade the mulch to red rubber mulch, but right now it just seems to expensive.


That wraps up the playground project. Please let me know if you have any questions or suggestions on how I could have done this better.

-Chris

Building a Playground without Spending a Fortune (Part 3)

Now that we have prepped everything in part 1 and got the fort constructed in part 2, we can move on to the swings and other hardware.

The Cool Wave Slide was simple to install on top of a 4x4. I used carriage bolts to mount the scrap 4x4 to the fort and then screwed the slide in on top of it.

There are a lot of recommendations regarding the placement of swings in relation to fences. I decided to follow the 2x the length of the swing policy. This dictated where I placed the entire playground originally but I could have shortened the swing. Ultimately, the playground area is twice the length of the swing on both sides.

I mounted the swing hardware with carriage bolts through the 4x6 and attached the swings. For the cross member support, I used the steel frame to ensure safety.


I used my Werner ladder and Irwin clamps to hold the cross member in place after leveling.


Then I could add the support 4x4s with the simple angle cut.


I wanted to hide the A-frame a bit so I used pieces of 4x4 to go under the 4x6 joist. I used foot long landscape nails to anchor the support beams into the ground.


With the swing hardware mounted, we are almost done!


I drilled a 3 inch PVC pipe to make a drain for the sandbox.


All that is left is to add sand to the sandbox and the protective support material and accessories. We will do that in the next post.

 
-Chris

Great Deal on Sonos Home Automation Speakers

Through December 27th, Amazon is offering great deals on Sonos speakers with additional Amazon credit with purchases. Sonos speakers are compatible with SmartThings and allow you to do text-to-speech and play sounds to coincide with events such as motion. I am putting together a Christmas project involving a Sonos.

I am sold on the Sonos Play:1, but the soundbar looks awesome with a $50 Amazon credit included. I am also intrigued by the highly reviewed Sonos Connect which allows you to integrate with an existing home stereo system.

Ultimately, I would love to connect to my existing Onkyo system through an app. However, I am more excited about giving my SmartThings hub a voice.

Don't forget to sign up for Amazon Prime to get free 2-day shipping!


-Chris

Building a Playground without Spending a Fortune (Part 2)

In the previous post, we prepped the site, poured the concrete footers and mounted the supports for the fort. I elected to cut the 4x4s after everything else was done. For anything that is not load bearing, I used deck screws. I used 1/2 inch carriage bolts to attach wood to wood for load bearing. Other areas I used a combination of joist hangers and FastenMaster HeadLOK fasteners which are really easy to use. With some careful measurement, I could lay the deck boards onto the joists:


Now I just needed to cut the deck boards to length, drop them on and screw them in.


Once the deck boards were in place, I cut a scrap 4x4 piece to be the header and base for the rock climbing ladder. I used to 4x6 pieces on both sides and as the steps on the ladder. 


To ensure that kids don't climb out of the sandbox into the area with the swing, I used evenly-spaced 1x4 lumber to close off the sandbox. I put 2x4s on the top and bottom to hide the fasteners and clean up the look. 


Next I continued the 1x4 pattern on the top of the 6'x6' fort and chopped off the top of the 4x4 support posts.


I used scrap 4x6 boards to make 2 seats in the sandbox and 2x4 boards to cover the fastener points on the deck boards.


This is where I called it quits for the first day of actual building but second day of the project. The first day was digging, measuring and pouring concrete.


In the next post, I will go over adding the swings and playground accessories.

-Chris


Building a Playground without Spending a Fortune (Part 1)

Although this blog will mostly be focused on home automation, I want to cover some of my other projects and experiences over the last year or two. One memorable project that I finally wrapped up was building a playground for my kids. After deciding where the playground was going to go, I had to remove a tree that was extremely unhealthy. I paid to have it downed by a professional ($$$) and then chained the rest myself to be burned in the fireplace and firepit.


After renting and running a stump grinder, I prepped the area and did measurements so I could work around the healthy trees that provide great shade for our yard.


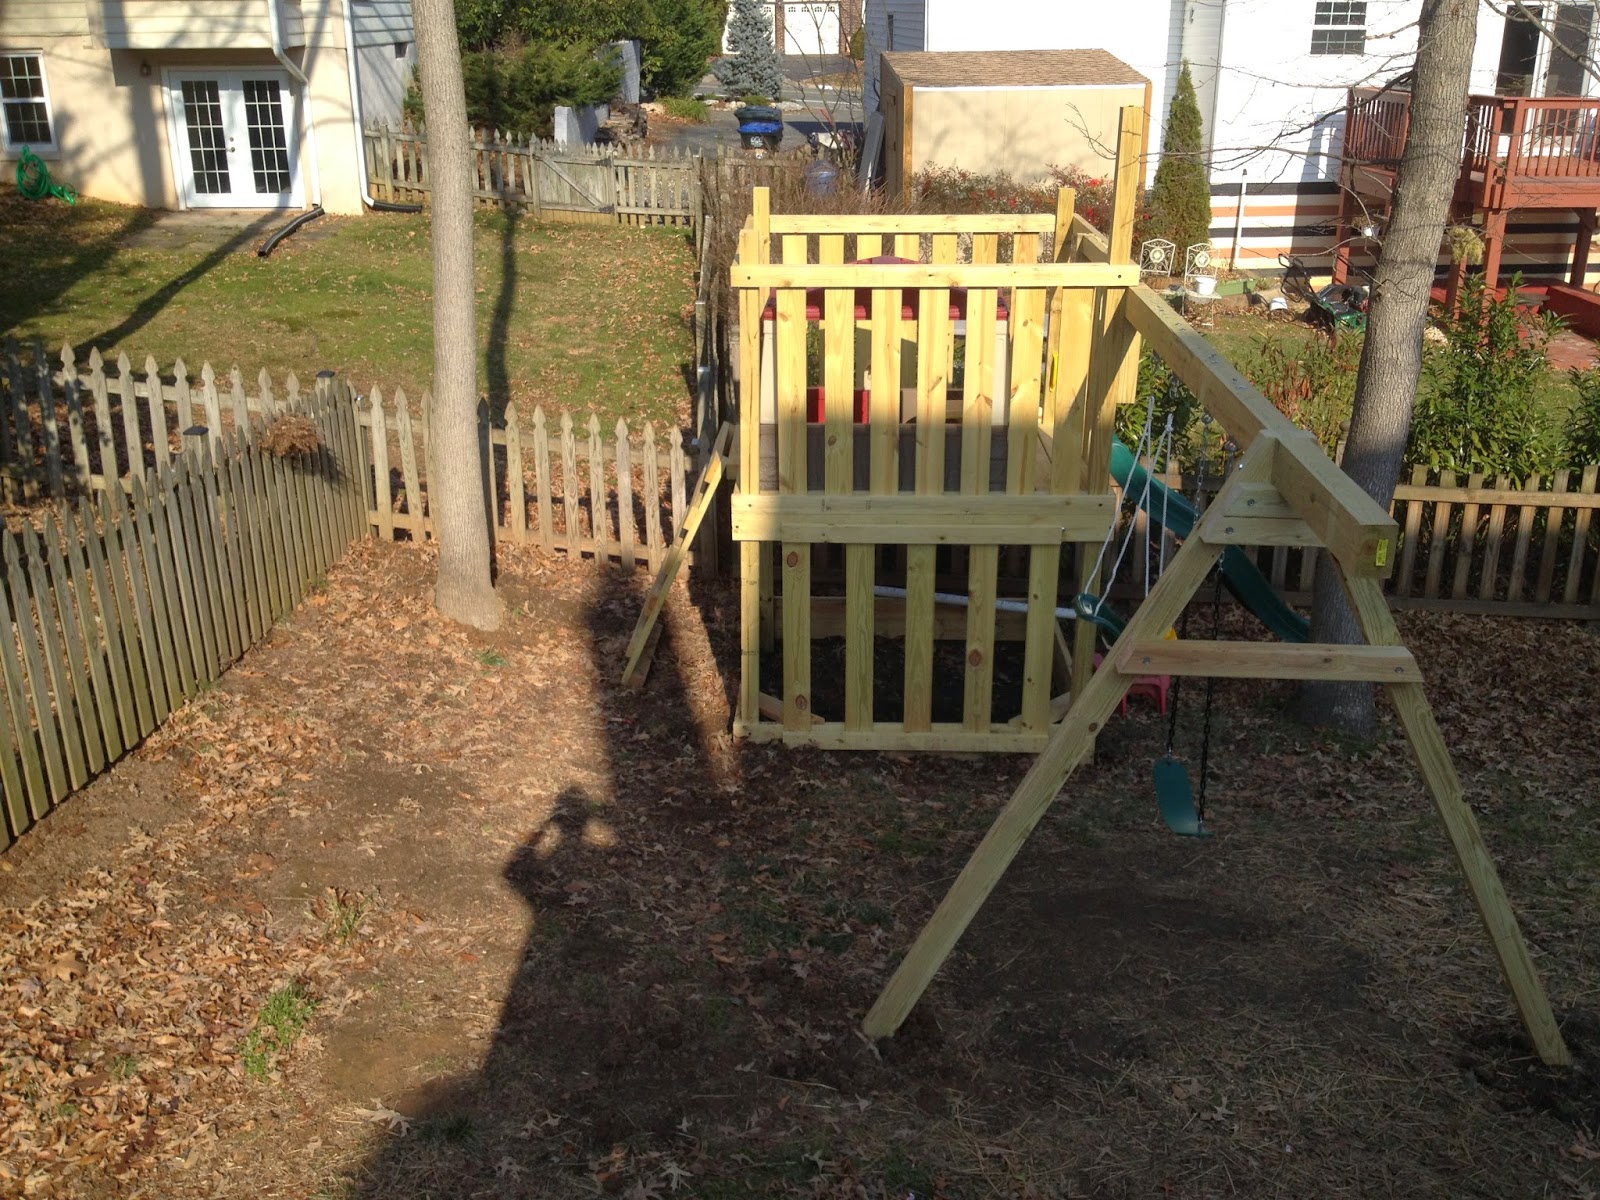
Once I gathered requirements for the project from "the boss", I started researching kits. Since the sandbox was supposed to be at least 6'x6', that made most playground kits too small. Overall, I found most kits to be extremely expensive and constructed from weak materials. Other requirements included a fort, slide, rock climbing wall and 2 swings. I decided to design and build my own, which worked out well in the end.

While I was planning the build, I created an Amazon wishlist that we shared to family and friends with all the accessories required for the project. As the kid's birthdays and other holidays passed, we collected most of the accessories that were needed! Definitely a great idea for bigger projects, but you will have to send pictures in the thank you cards. Not a bad trade-off at all.

The yard slopes significantly away from the house, so I elected to use concrete pads to level everything. I decided to use 4x4s for the support beams. I dug 4 holes 2 ft  deep and poured concrete in the holes to provide a solid base. Next I put a post base in each hole with screws before the concrete dried.

I used #2 type pressure treated lumber from Home Depot because it was convenient to source and as a Veteran, I occasionally get a discount. I used 4x4s, 2x4s, 2x6s, 1x6s, standard decking and a 4x6 for the swings. The total cost of lumber was $278 and I ended up using the excess on other projects. Most of the boards were of good quality, but I did return a few for replacements.

Besides the lumber, almost everything else was sourced from Amazon. Most of the cuts we 90 degree and were handled by my 10 inch sliding miter saw. I did rip a decking board or two with my Ryobi Table Saw and both saws have newish Diablo blades  . I also used my Black & Decker 20-Volt MAX Drill kit pretty heavily for a lot. It was a great Christmas gift and so far has stood up to some serious abuse.


Since I did this project by myself, it was certainly a challenge to level and balance each 4x4. I worked one at a time and used scrap 2x4s and Irwin clamps the build little braces to hold them. Once they were drilled into the base, they were surprisingly easy to work with. I used 2x6 boards to create the fascia and sandbox as pictured. I measured each run before cutting the boards to compensate for imperfections in the lumber and imprecision on my part.

I will cover the fastener hardware in the next post. Please feel free to ask me questions about any of my projects!

-Chris


Friday, November 28, 2014

Dropcam on sale for $99

Yesterday I posted about the Nest Thermostat for $50 off on Amazon, today I noticed that the Dropcam camera is $50 off as well!  I am going to pick one up to review on this site later. Dropcam is owned by Nest and integrates into both their system and Smartthings. The integrated burst and picture features with Smartthings don't require the CVR monthly service cost which makes the Dropcam a great, affordable home automation addition!


There is a more expensive model and it is for indoor use only, but there are some nice cases available for outdoor use.


Get 10% off of SmartThings kits!

-Chris

Thursday, November 27, 2014

Black Friday Deal on Nest

As you recover from your Thanksgiving feast and prepare for the insanity of Black Friday tomorrow, check out the great deal Amazon has on the Nest thermostat for $199.


 I love my Nest Learning Thermostat and how it integrates with the Nest Protect. It is super easy to install and has already save us a lot of money on energy costs. Nest integrates with the SmartThings Hub and looks fantastic on the wall.


-Chris

Wednesday, November 26, 2014

Welcome to Smart Dumb Stuff!

This is the obligatory "first post" on this new blog. I decided to start a blog after spending the last few months researching, installing, breaking and using several home automation and home improvement products. The focus of the blog will be on products that I use or interest me and projects that may seem dumb to people. It seems that a lot of people are starting their adventure now and maybe I can help.

I am not an electrician or even a handyman for that matter, so my advice should not be followed blindly. If something isn't clear or you aren't comfortable dealing with high voltage applications, consult someone that is. I was able to accomplish everything with patience with minimal damage to my drywall. I don't work for any of the companies that I will be talking about and I will disclose if I have any interest in a company or product.

Every house and situation is different so get to make decisions on how you want your system to be set up. Isn't that exciting?

Lets do dumb things with smart stuff!

-Chris