Friday, December 19, 2014

Small Projects and Small Annoyances

This post is about both home improvement and home automation. Sometimes a project isn't as easy as it should be. For example, when installing some Z-Wave light switches to control my yard lights,  I ran into a strange problem. A previous owner (I am assuming) had installed door trim over a portion of the gang box. They trimmed the cover to fit and I had never even noticed it.

In order to do a proper looking installation, I needed to remove the old box and put in a new one with enough space to clear the trim. Step one was flipping the breaker and testing to ensure that power was indeed cut off. I recommend a non-contact tester. Next I removed the old switches, labelled the wires and photographed everything.


Since power was cut to my entire basement, I used a head-mounted flashlight which is definitely handy. Next, I cut a whole a few inches above the box to pull all of the wires through so that they were out of the way.


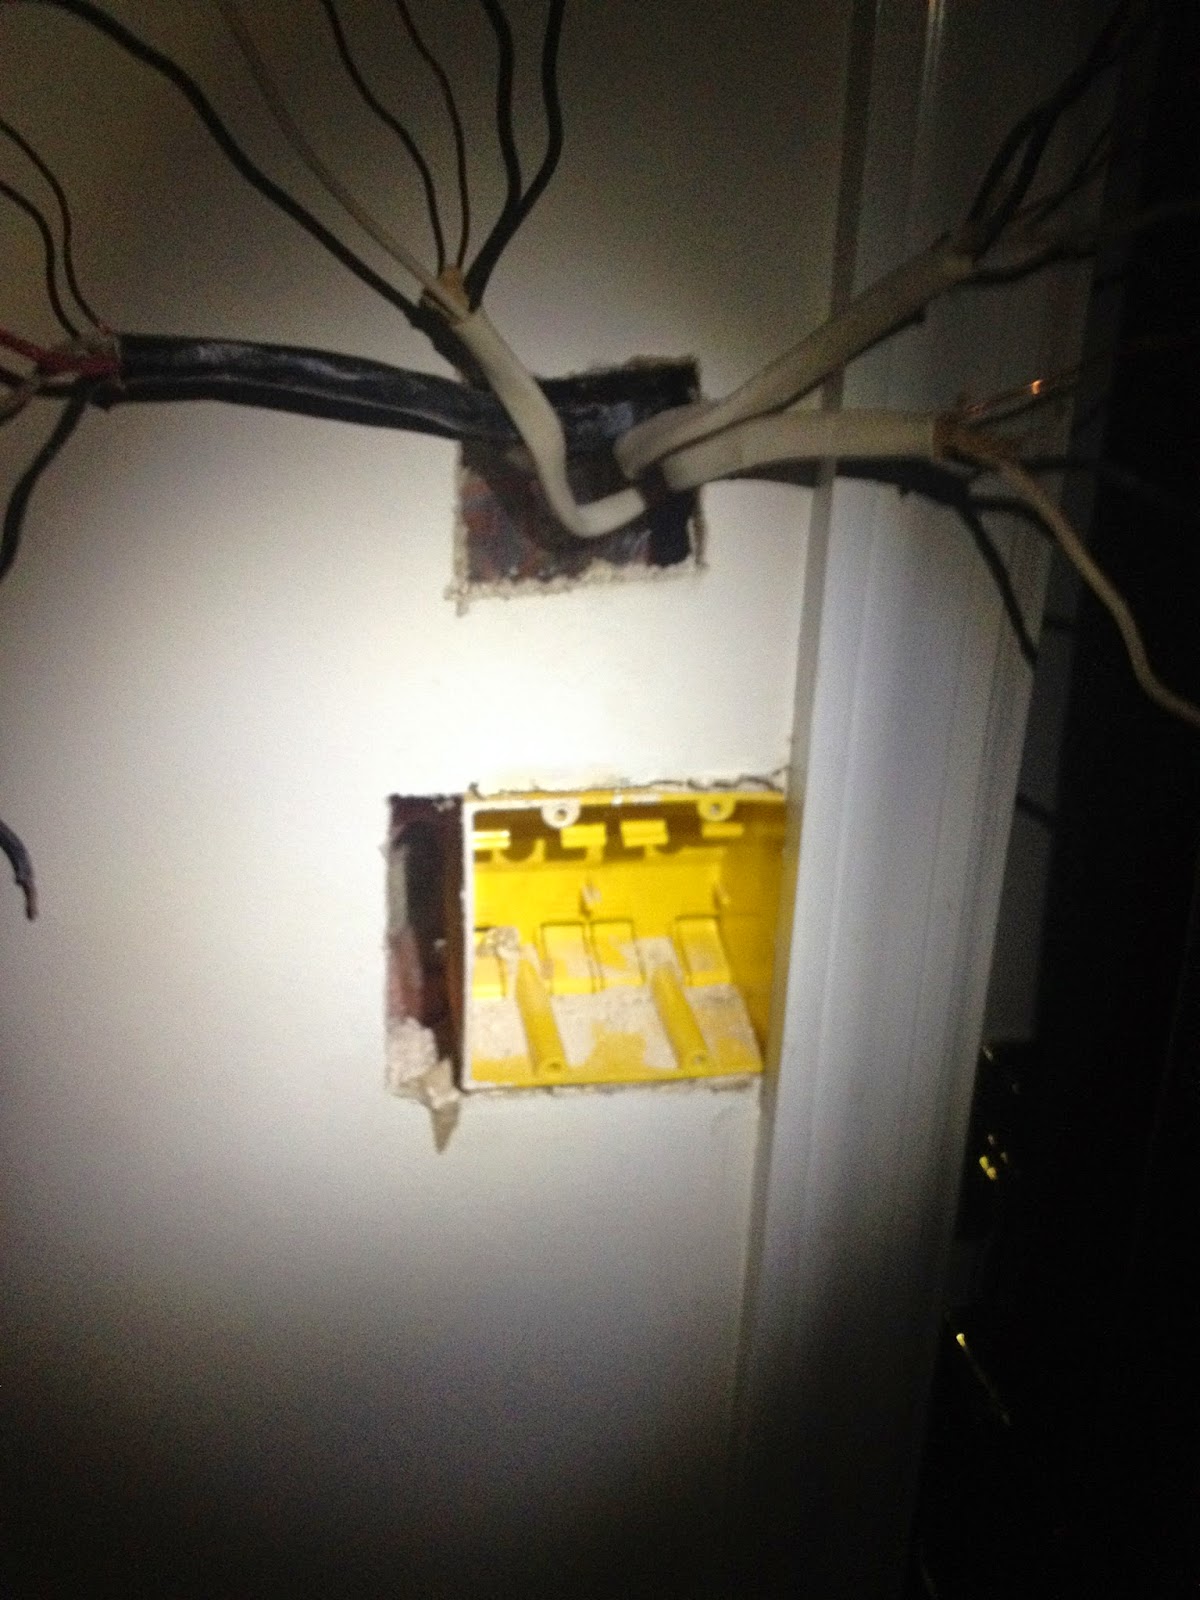
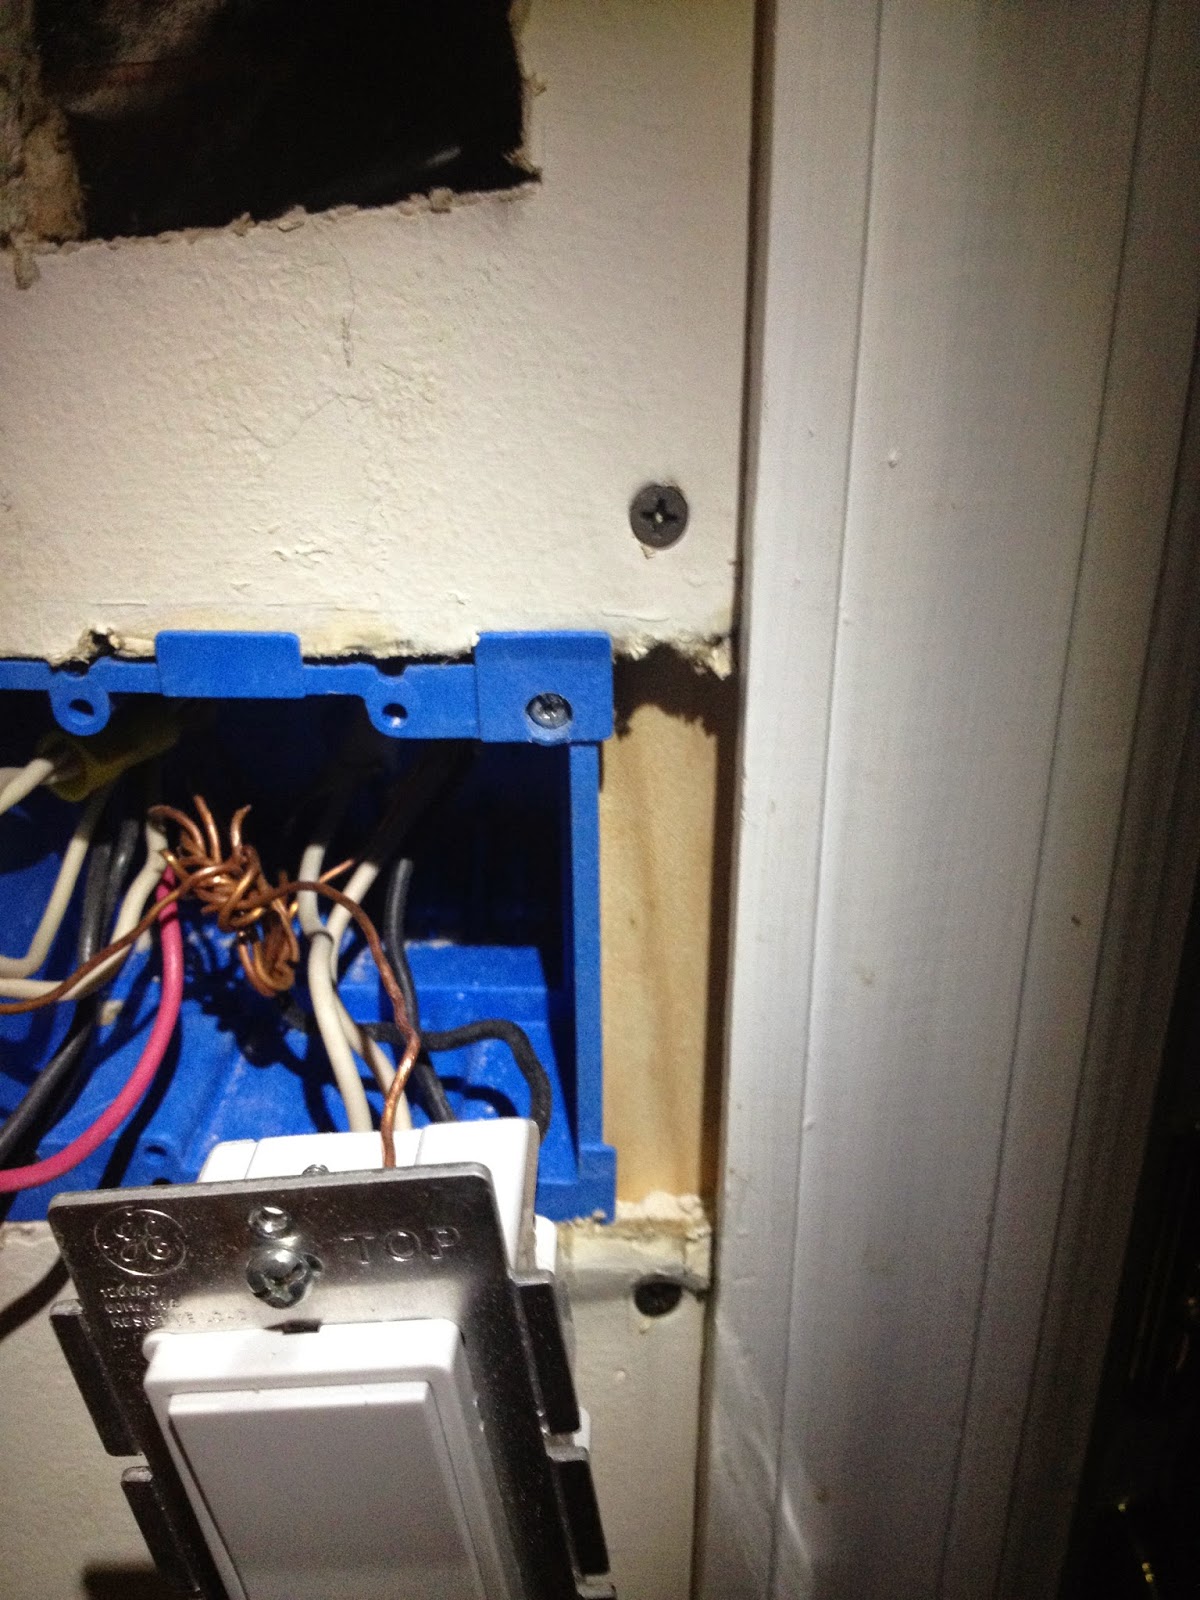
The old box took some work to get out. I ended up using my cutoff attachment to cut the nails. Thankfully, an "old work" gang box is super easy to install. Once I fed the wires back through the box, I needed to patch the space between the box and the trim. I decided to use a paint stir for support.


Using drywall screws to hold it in place, I then cut a piece of drywall to fit and reinstalled the new switches.


Next, I flipped the breaker on and tested to ensure the switches were working properly.


All that is left is to finish the job. I applied some patch material and allowed it to dry.


After a few rounds of sanding and reapplication, it was time to paint and enjoy my new SmartThings device!


A job that probably should have taken 15 minutes ended up taking a few hours. That happens from time-to-time and it certainly won't be the last time it happens to me. It was a challenge worth tackling though and I am happy with my new remotely controlled light switch.

-Chris


Thursday, December 18, 2014

My Favorite "Smart" Thing

There are probably two reactions to seeing a home automation demonstration:
  1. That is awesome.
  2. Why would anyone do that?

Originally, I had the ladder reaction. Some events changed that, but I now find it funny that one of the first things I tested has become my favorite. It is so simple but has definitely improved our mornings dramatically.

After spending some time in Europe, I grew accustomed to towel warmers. Once you get used to a dry, warm towel (think fresh out of the dryer), it is hard to go back. We have had ours for over a year. Until recently, we relied on a manual system of turning it on and off which wasn't really convenient and resulted in the warmer being left on all day a time or two.


SmartThings and a Leviton appliance module solved that problem. Similar to other problems, a less expensive mechanical timer may have helped, but they don't know if you are home. Now the warmer will come on before we get up both during the week and on weekends and will turn off on its own. 


My next plan is to have it come on when we change the status when we awake. I will keep you posted.

-Chris


Wednesday, December 17, 2014

25% Off a Single Item at Harbor Freight Tools


Although not known for their long term reliability, Harbor Freight has great deals on tools you may only need to use a few times. I have actually had really good success with every "Chicago Electric" tool I have purchased there. There is a 20% coupon on the main page, but through January 3rd, they are offering 25% off one item with coupon code "52526026".

-Chris


More Than Just a Timer with SmartThings

Our Christmas lights aren't elaborate. We put up icicle lights every year and have added a few pieces here and there but nothing to crazy. Normally, we plug everything into a timer or two which turn the decorations off and on based on a schedule.


This year, we decided to use SmartThings and put our outdoor Z-Wave enabled plugs to use. It is one of the items on spreadsheet.


The device pairs easily and has a convenient manual override button on it. The people at SmartThings also include several festive images to differentiate the switch from your other devices. They are available in the "Seasonal Winter" section of the icons.


One simple way to make this a step up from a simple timer is to customize and control the plug with "Turn on using a schedule", "Turn off using a schedule" or "Turn off after a period of time". That gives us the option of turning the lights on at sunset and then off a few hours later which is exactly what we want.

Now hipster Santa can make his appearance at just the right time each evening and be turned off automatically. Additionally, we can remotely turn the lights off.


Happy holidays!

-Chris


Tuesday, December 16, 2014

Upgrading your Shower Head is Worth it


Our old, dirty shower head didn't really bother me. Sure it was old and dirty, but it worked. It did spray water against the back wall which threatened to set off the new water sensors, but I really didn't mind drying the floor with my towel. Fortunately it wasn't my decision because the upgrade has made a world of difference.

She picked up a few Waterpik powerspray shower heads and the installation literally took minutes. We chose this particular model because we have small children and the extension works great for them and quick clean up chores.


I needed a knife to open the box and a Vise-Grip plier to remove the old shower head and tighten the new one.


The package contained the following:


Now we can put the new one on.


Now attach the hose.


That was it. All done.


After a few showers, I can definitely tell the difference. It feels like we have more water pressure and we have the added convenience of being able to remove the shower head if we need to. Easy project that will probably take you less than 15 minutes a shower to do and completely worth it.

-Chris

Santa fun with Smartthings, Sonos and Hue

There are obvious ways you can use SmartThings to automate your holidays, but there are also some fun and easy ways to make it fun for the kids too. For example, there will be a nice surprise for the first of my children to bolt toward the stairs on Christmas morning.

My goal was to play an mp3 that I made by mixing some sleigh bell sounds with a Santa Claus "ho, ho, ho" from a speaker located in the same room as my fireplace (and the Christmas tree). The speaker is a Sonos Playbar (Sonos speakers get up to a $50 credit on Amazon right now!) that has been added as a thing to my SmartThings hub but any connected speaker will work.

The first thing I did was find the sound effect that I was looking for and dubbed over the extra "ho, ho, ho". I dropped the finished mp3 into my music folder so that it would show up in the Sonos app. Next I paired a door sensor (the one on the recommendations page) with SmartThings and placed it on the kids' door.


I already had the "Sonos Notify with Sound" SmartApp installed so I just needed to configure it.


There are lots of options for how to trigger the sound or text, and a motion sensor would probably work better for most people. I chose the "Contact Opens" to use my door sensor.


Now we just need to select the speaker we want to play it on and click "More options" to select "Or play this music or radio station"


Now select the mp3.


You could create a "Christmas Day" mode and set it to only play then. You could also specify that it only be played once per day to ensure that it doesn't play a second time.


That was really easy! For added dramatics, I am going to have the room light turn off and three hue bulbs glow red and green briefly. It should all be over before they can get down the stairs. I will let you know how it goes. Maybe I will be able to capture it all on the Dropcam.

 How are you using home automation this holiday season?

-Chris

Wednesday, December 10, 2014

Quick Recommendations for SmartThings Purchases

I will be updating this list as I go, but I figured I would create a quick reference of products that I have tried and liked. The ratings are on a scale from one to five, and I plan on doing a full review post for each item eventually. Anything that paired the first time and worked as advertised gets a 5. Since I have friends that are also installing their own systems, I left room for them to rate products that I haven't tried.

If you are planning on following my strategy, you should definitely sign up for Amazon Prime.


Let me know if you find this helpful or have other feedback on the products.

-Chris

Verifying Z-Wave Devices

In my hunt for the least expensive devices for my home automation projects I have found quite a few suspect devices. These "no name" or "no brand" devices are being sold with little information at quite a discount on Chinese websites. I wondered if there was a way to ensure that a device was certified as Z-Wave and it turns out there is!

There is a search feature on the Z-Wave website which seems to list all of the products that I currently have, but does not list the suspect devices. I have no doubt that some of the devices will work, but I would rather get a device that is legitimate.

-Chris


Monday, December 8, 2014

Z-Wave Energy Monitoring Plug for $30


One of the hardest pills to swallow with home automation is the cost. If you are careful to purchase things that work well and grab them on sale, home automation can be even more affordable. For example, some plugs cost between $50 and $60 but there is one that has good reviews that is available for under $30. I ordered one so I can review it in a future post, but it looks like a potential winner!

Don't forget to sign up for Amazon Prime to get free 2-day shipping.

-Chris


Sunday, December 7, 2014

Honeywell Smart Wifi Thermostat for $162

Overstock.com is selling the Honeywell Wifi Smart Thermostat for $181.99 which is a decent deal, but they also have a coupon which takes $20 off. Click this link to apply the coupon and then search for the product.

If you missed the deal and are still interested in the thermostat, the reviews are here.

-Chris


Monday, December 1, 2014

Why I chose SmartThings

When my basement flooded the first time, I paid my $1000 insurance deductible and then spent a few weeks coordinating repairs and replacement purchases. I paid for the plumber to camera the line and determined that the backup was caused by a toy that was flushed down the toilet. The toy caused waste water to backup into my basement office. Overall, it was extremely painful. To avoid that pain, I installed battery powered water detectors all over. 10 of them.

Over a year later, the basement flooded again. This time, the toilet was clogged by excess toilet paper and the handle was stuck all day. This caused toilet water to flow from the main floor bathroom down the wall and into basement.


An alarm sounded, but no one was home to hear it. The water ran all day, but that doesn't look like much damage does it?


Unfortunately, water isn't always predictable. The water went down the floor register and found its way on my flat screen TV, entertainment system and a bookcase. Some of the books that were soaked are irreplaceable. It was emotionally scarring.

A week later, there were still commercial dehumidifiers and fans all over my house. The house was loud and hot. Doors started sticking and everyone was miserable. I had to prevent this from happening again. The night of the damage, a friend recommended that I check out SmartThings.

After spending thousands of dollars after both incidents, I knew it was worth it. I took a few weeks to research all of the different systems on the market and ended up choosing SmartThings for several reasons. The first reason was the support community. Reading how employees interact with users gave me confidence in their support. The second reason was the company's goal to make other products work with their system. The fact that I could integrate my Nest and Hue systems was huge.

After using the system for a few weeks, I really wish I had installed it earlier. Purchase and installation were painless. The SmartThings Hub arrived the day after I ordered it. Thank you Amazon Prime! I elected to just order the hub, but the Energy Saver Kit is a great deal directly from SmartThings (Get 10% off).


It included a power cable and network cable.


I installed the app, plugged it in and followed the directions and was up and running in 10 minutes. Once I installed the water sensors and set up push notifications, I finally have peace-of-mind.


Everything is OK thanks to SmartThings.

-Chris


Saturday, November 29, 2014

Dropcam for $99 at Home Depot

In case you missed the Dropcam deal on Amazon, I spotted this at Home Depot:


It looks like they are discontinuing the cheaper Dropcam camera at Home Depot. That is cheaper than an equivalent-featured baby monitor and if you have SmartThings, it does so much more.

-Chris

Building a Playground without Spending a Fortune (Part 4)

In part one we prepped, in part two we built the fort and part three attached the hardware. That leaves us here:


I left one of the support posts tall in order to attach a flag pole to eventually. I staked out the area and used landscape timbers to separate it from the rest of the yard. After filling the area with a few yards of quality mulch, filling the sandbox with sand and planting a replacement tree, all that is left is to stain it after a few months.


It had to survive a few freak snow storms before it could finally get stained.


After trying out a few stains on some scrap wood, I eventually settled on the Sikkens translucent mahogany stain. It is dark red and matches our deck. In this picture, you can see the rock climbing holds on the ladder, the yellow handles and after a nephew whacked his head on the 2x4 crossbars I added two safety pads .


After a year, the playground and sandbox has gotten a lot of use and I expect that it will last for many years to come. The fort easily supports several adults without so much as a wobble. 

I plan on staining the landscape timbers to match when I get some time. I am also not happy with the quality of the sand that I got from Home Depot. I am going to look for volleyball sand in the Spring. I may also upgrade the mulch to red rubber mulch, but right now it just seems to expensive.


That wraps up the playground project. Please let me know if you have any questions or suggestions on how I could have done this better.

-Chris

Building a Playground without Spending a Fortune (Part 3)

Now that we have prepped everything in part 1 and got the fort constructed in part 2, we can move on to the swings and other hardware.

The Cool Wave Slide was simple to install on top of a 4x4. I used carriage bolts to mount the scrap 4x4 to the fort and then screwed the slide in on top of it.

There are a lot of recommendations regarding the placement of swings in relation to fences. I decided to follow the 2x the length of the swing policy. This dictated where I placed the entire playground originally but I could have shortened the swing. Ultimately, the playground area is twice the length of the swing on both sides.

I mounted the swing hardware with carriage bolts through the 4x6 and attached the swings. For the cross member support, I used the steel frame to ensure safety.


I used my Werner ladder and Irwin clamps to hold the cross member in place after leveling.


Then I could add the support 4x4s with the simple angle cut.


I wanted to hide the A-frame a bit so I used pieces of 4x4 to go under the 4x6 joist. I used foot long landscape nails to anchor the support beams into the ground.


With the swing hardware mounted, we are almost done!


I drilled a 3 inch PVC pipe to make a drain for the sandbox.


All that is left is to add sand to the sandbox and the protective support material and accessories. We will do that in the next post.

 
-Chris